Imaging Lens Upgrade
The first upgrade you will want to do is to replace the imaging lens of the spectrometer. This will allow you to both increase resolution and save money at the same time!
First remove the imaging lens from the breadboard as well as the tunable iris (Thorlabs SM1D12C). The imaging lens can be replaced by a NAVITAR MVL50M23:
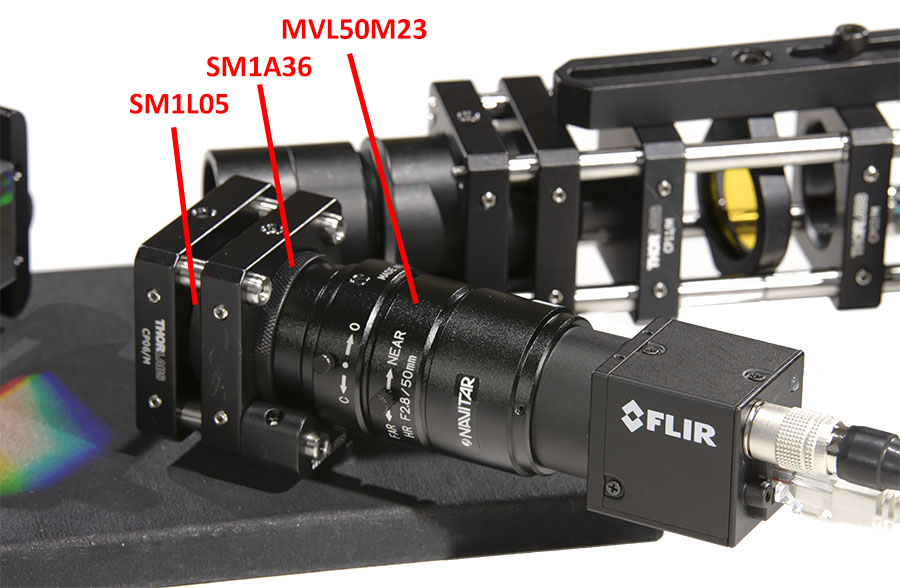
The lens can be inserted in the breadboard using a SM1A36 adapter ring and a SM1L05 tube. You will have to realign your spectrometer but the procedure stays the same. You will also have to stop down the aperture ring to about f/4. This is not easy because the camera lens does not have tick marks so you will have to use your best judgement when looking at a neon lamp spectrum to make the image as correct as possible without stopping down too much.
I must stress however that you cannot replace this lens by any other one. I have valided the setup for this lens only from an optical raytracing simulation and I cannot guarantee performances with any other lens.
Because the imaging quality of the new lens is much better, you can also take the occasion to change the slit by a 10 µm or a 15 µm one. This upgrade will then bring the resolution to 0.15 nm or 0.20 nm depending if you are using a 10 µm or a 15 µm slit. This upgrade is mandatory is you plan to later upgrade the laser system to reach high spectral resolution.
Here-below is an upgraded BOM. You can see that the cost has actually decreased by 29.79€. This is therefore an important upgrade that I strongly recommend, especially if you are starting with the spectrometer and haven’t purchased anything yet.